How to Make Paper Butterflies
This spring we’ve got short instructionals for three different paper butterfly decorations.
Some ideas on how to display your paper creations;
- Glue the finished butterflies to a bamboo skewer and add to a spring floral arrangement or house plants. Or create a unique paper arrangement using only the paper butterflies.
- Hang from a ribbon to create a whimsical mobile feature in a playroom or classroom.
- Decorate a classroom bulletin board, home activity board or create a feature wall in your home.
- Photo or selfie backdrop!
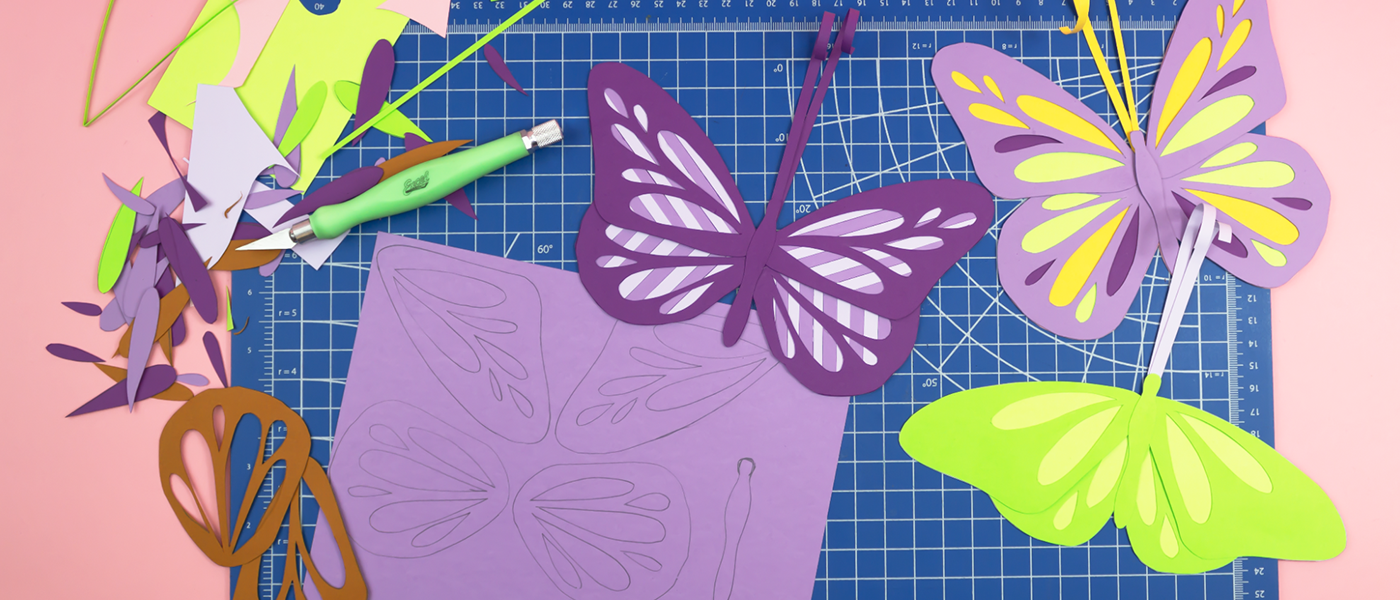
Paper Cut-Out Butterflies -
This project is inspired by Monarch Butterflies with a spring color twist! You can do this project by drawing the butterfly freehand or simply download our template.
Supplies:
- Cardstock in selected colors
- Glue or tape
- Hobby Knife
- Tracing Wheel (Optional)
- Ruler
- Cutting mat
Two ways to transfer our template:
- Option 1: Print on printer paper and trace onto cardstock using the small tracing wheel.
- Option 2: Print on white cardstock, cut out to make a stencil, outline with a pencil on colored cardstock for your final butterflies.

To cut out the butterfly wings, start with the small details on the inside of the wing, then cut out the wing. Cut out the butterfly body and set this piece aside.

Next, cut out different colored paper to glue behind the wing detail cut-outs. You can get very creative here, make each one a different color or arrange in a gradient, alternating or random. Creator's choice!
Then, arrange the wings in a preferred shape, fully opened or positioned downward, then tape or glue in place. Add the butterfly body in the center. If using glue, allow it to fully dry.
Using a ruler and craft knife, cut two thin strips, about ⅛” wide. As always, protect your table surface and cut on a cutting mat.
Swirl one end of the strips to curl it. We used the edge of the ruler to do so, this softened the paper fibers or the cardstock we used and curled the paper in a subtle spiral.

Select a cardstock color to use as backing for your butterfly. Place the butterfly on top and either
- Trace the outline with a pencil, skipping the antennae, cut out and glue to the back
- Add glue to the back of the butterfly and glue to the paper, then cut out along the edge with a craft knife.
Simple Circle Butterflies -
Supplies:
- Cardstock in selected colors
- Stapler
- Glue
- Circle Cutter
- Hobby knife
- Cutting Mat
- Awl
- Ruler
Tool Tip: Our Circle Cutter is designed to fit various rulers, if you are using a ruler that is thin, add a folded piece of cardstock in the slot so that the ruler doesn’t move around.

With the swivel blade and pin post combo, set the circle-cutter to 2” for a 4” circle, cut one. Reset to 1.5” for a 3” circle, cut one.

Using a ruler and an awl, score both circles down the center horizontally and vertically. Don’t press too hard so as to not cut through the circle, practice as needed on scraps of similar paper.
Then fold over and place the smaller circle one on top of the larger one. Bring the apex of each circle together and staple on the score line as closely to the edge as possible. Fold out, then open up each section.

Add glue as needed to widen the opening of each “wing” or keep them small. If you’re making a cluster of these butterflies, mix and match for more texture.
For a cute and whimsical version, add antennae. Use a narrow strip of paper, approximately ⅜” wide, then swirls each end, fold in the middle and glue in the fold of the top wings.
These simple paper butterflies are not only quick to make, but very effective for a chic, minimalist decoration. Try different larger sizes too!

Folk-inspired Paper Butterflies -
These butterflies are inspired by the traditional Polish folk decorations, you can read more about this art in our Christmas ornament post here.
The supplies you will need for this quick project:
- Cardstock in five colors
- Hobby Knife
- Cutting Mat
- Ruler
- Glue
- Paper clips

First cut two half-inch wide strips from each paper. Arrange the colors in the desired order then cut to size as follows:
- 1st color - 8.5”
- 2nd color - 7.5”
- 3rd color - 6.5”
- 4th color - 7.5”
- 5th color - 6.5”
Don’t discard the short cut-offs, we’ll need a couple of them for them later.

Next, glue ends of each strip together so that each strip forms a water-drop shape. Then glue the same color tear shapes together so they form a “bow” - to help the glue set, use a paperclip to hold the ends together while the glue dries.
Once each piece is dry, glue the shapes together, apply glue only in the center. Press firmly or use a paper clip to hold together while the glue sets. You now have the general shape of the butterfly.
Take the 2” cut-off (from the earlier step), apply a thin layer of glue to one side and wrap around the center of the butterfly shape. Make antennae from the other cut-offs by gluing the edge to the middle.
We made a short “how-to” video and can be viewed on our Instagram or TikTok: @excelbades
Which ones will you make? Let us know by tagging us #excelblades and sharing your ideas. We love to see what you create!