DIY Fall Crafts to Help You Celebrate the Season
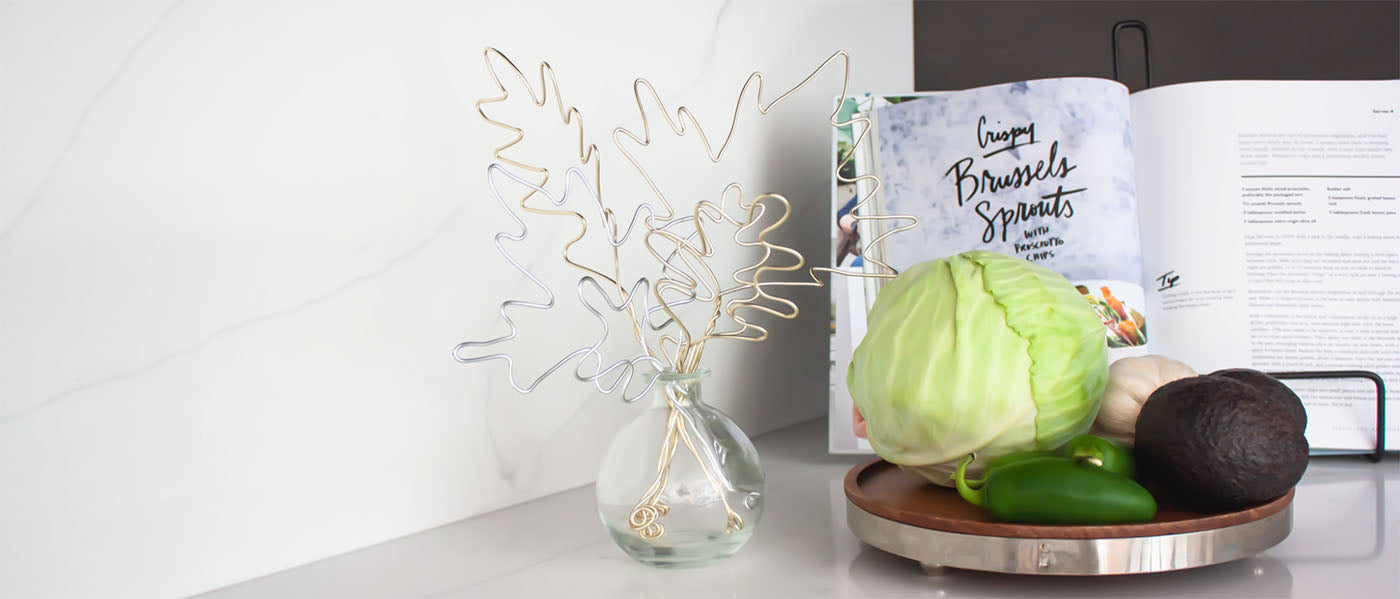
Chic Wire-Leaf Arrangement
This project is a fun one! You’ll need some craft wire in colors of your choice. We used a 14-gauge in silver and gold colors for this project. Additionally, you’ll need leaf templates and round nose pliers with a side cutter.
Set up your leaf template on your work table and roughly estimate how much wire you’ll need and then cut using the needle nose pliers with the side cutter. Place the wire at the top of your leaf template and, using the pliers, gently bend the wire along the template. Start with one side and then repeat the steps on the other side of the leaf.
Tip: If the wire is long for a larger leaf, clear your work area so that the wire does not get caught on anything.

Twist the two end wires together into a stem and end with a tight loop by using the tips of the needle nose pliers.
Tool Tip: Place both wire ends between the two ends of the pliers. Close the pliers and slowly turn to create the “swirl” design.

Fall Lanterns

Customize your fall decor with this quick and easy project. You’ll need just a few items: colorful paper, a cutting mat, a ruler, a K26 Fit Grip Knife, a pencil and eraser, double-sided tape, a few glass cylinder vases and LED lights.
Get Your Cutting Mat Today!Start by measuring the surface area of the vase and marking it on your paper. Then, begin sketching your design in pencil on the side of the paper that will be attached to the vase. Leave about a ½” allowance on all sides of the paper. This will help prevent the paper from ripping at the edges.
TIP: Drawing a grid on your paper before sketching the design helps to keep the elements straight or evenly spaced — especially when the design has geometric shapes like rectangles.

On your self-healing cutting mat, cut out the design using the K26 Fit Grip Knife.
Tip: Rotating the paper helps to get a smoother, more precise cut. Move the portion of the paper you are working on to a position that is most comfortable and natural.
Once finished, gently erase any excess pencil marks and then add a piece of double-sided tape to each corner of the paper and carefully tape to the vase. If working with a thicker or stiffer paper, use more tape, including in between the cut-outs to ensure the paper will stay attached to the vase. Start with one side and smooth out. Press over where each piece of tape is attached to ensure hold.
Lastly, insert the LED light and you’re done.
Confetti Table Runner

For a pop of color at your next dinner gathering, decorate the table with a paper confetti table runner. It’s colorful, easy to make and recyclable.
You’ll need craft paper in a few colors, a cutting mat, a dual-strip cutter, a circle cutter and craft scissors.
Shop Craft Scissors
Set the circle cutter to about three inches and cut out the circles in all colors. Then, set the circle cutter to a smaller size, about two inches and cut out in each color as well. For the square-shaped confetti pieces, use the dual-strip cutter to cut .5-inch wide strips and then using the scissors, cut across to create small .5-inch squares.
Tool Tip: If you are a beginner, use the pin and pencil posts on the circle cutting tool first to draw the circle and then use the blade post to cut it out. Following the pencil line is good practice for cutting the shape smoothly.
Make as few or as many as needed for the festive decor. Beginning with the large and small circles, lay out on the table by mixing the colors and sizes randomly and then sprinkle the mixed smaller square confetti on top of the circles. Finish by placing amber-colored LED tealights on the surface for an added fall ambiance.